Elevate Your Bathing Haven: A Guide on How to Change the Color of Your Bathtub
Dreaming of a vibrant bathtub that reflects your unique style? Look no further! This guide is your key to a bathtub transformation that goes beyond the ordinary. Join us on a creative journey where we explore the art of changing the color of your bathtub. No mundane moments here—just a cascade of inspiration, a burst of creativity, and a sprinkle of markdown magic. In this guide, we’ll unravel how to Change The Color Of A Bathtub From choosing the perfect color palette to executing a flawless paint job, every stroke is an opportunity to redefine your bathing space. Let’s dive into the world of bathtub makeovers, where your creativity takes center stage and your bathtub becomes a masterpiece. Get ready to elevate your bathing haven with a touch of color that echoes your personality.
Unveiling the Canvas: Your Bathtub
Before we unleash the color palette, let’s assess our canvas. Your bathtub is a blank slate waiting for a makeover. But where do you start? Here’s a creative markdown checklist to guide you:
Check the Surface
Inspect the bathtub surface for any cracks or imperfections.
Pro Tip: Smooth surfaces are the best canvases for a vibrant color transformation.
Clean the Canvas
Give your bathtub a thorough cleaning.
Choosing Your Colors: Bathtub as Your Artistic Canvas
Now comes the exciting part—the color selection process. Imagine your bathtub as a blank canvas, awaiting the strokes of your color brush. Let’s mark down the steps:
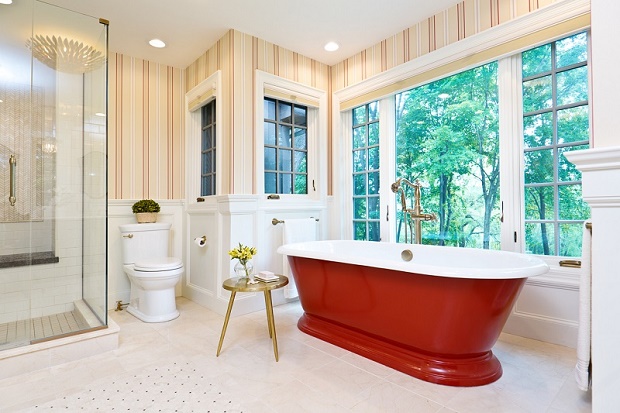
Bold Blues or Radiant Reds
Consider bold colors for a striking statement.
Pro Tip: Darker colors can add a touch of luxury, while lighter hues create an airy feel.
Ombre or Solid Splash
Explore ombre effects for a gradient masterpiece.
Pro Tip: Solid colors bring simplicity, while ombre adds an artistic touch.
Painting the Picture: Step-by-Step Guide
It’s time to unleash your inner artist. Let’s dive into the markdown-formatted steps for painting your bathtub:
1. Prepare the Surface
Before your bathtub undergoes its color transformation, it’s crucial to ensure that the canvas is primed for the artistic endeavor. Begin by giving your bathtub a thorough cleaning. This step removes any dirt, grime, or soap residue that might hinder the paint’s adhesion. Think of it as creating a pristine canvas for your masterpiece.
Once your bathtub is clean, take the extra step of sanding the surface. This not only enhances the adhesion of the paint but also smooths out any imperfections. A smooth surface ensures that your chosen color will be applied evenly, resulting in a more professional and polished finish.
2. Mask and Protect
Now that your bathtub is prepped and ready, it’s time to embark on the masking and protecting phase. Think of this step as defining the boundaries of your color canvas. Use painter’s tape to carefully mask off areas you don’t want to paint, such as the faucet, handles, and any other fixtures attached to the bathtub.
Additionally, cover fixtures and drains with protective materials. This precaution ensures that no accidental splatters or drips reach these elements, preserving their functionality and appearance. Taking the time to mask and protect is a small investment that pays off in the precision and cleanliness of your color application
How To Start A Bathtub And Countertop Resurfacing Business
3. Prime the Canvas
Now that your bathtub is a clean, sanded canvas with carefully masked edges, it’s time to apply the primer—an essential step for ensuring the longevity and vibrancy of your chosen color. Bathtub primer creates a solid foundation for the paint to adhere to, promoting better durability and resistance to chipping or peeling.
Select a high-quality bathtub primer suitable for the material of your tub. Apply it evenly across the entire surface, ensuring comprehensive coverage. The primer not only enhances adhesion but also helps to create a smooth and uniform base, setting the stage for the color transformation.
4. Color Magic
With the primer in place, it’s time to unleash your chosen color onto the canvas. Whether you’re opting for bold blues or radiant reds or exploring the enchantment of ombre effects, the application process is crucial. Apply your selected color evenly, ensuring full coverage.
Allow each coat to dry thoroughly before applying the next. Patience is key to achieving a seamless and professional finish. Multiple thin coats are often more effective than one thick application, reducing the risk of drips and uneven coloring.
5. Seal the Masterpiece
You’ve successfully brought your bathtub’s color transformation to life with careful cleaning, priming, and precise coloring. Now, it’s time to protect and seal your masterpiece to ensure its longevity and resilience.
Choose a high-quality bathtub sealer designed for the type of paint you’ve used. This final layer acts as a shield, guarding your newly colored bathtub against daily wear and tear, water exposure, and cleaning agents. Apply the sealer evenly, following the manufacturer’s instructions.
Allow the sealer to dry completely before using your newly transformed bathtub. This step is crucial for locking in the vibrant color, providing a durable finish, and making your bathtub resistant to scratches, stains, and fading over time.
Maintaining Your Artwork: Tips for Longevity
Your bathtub masterpiece deserves care to maintain its allure. In markdown elegance, here are the tips:
Gentle Cleaning
Preserving the beauty of your newly painted bathtub requires a delicate touch in your cleaning routine. Opt for non-abrasive cleaners to avoid damaging the painted surface. Abrasive cleaners can wear down the protective layers, leading to premature fading or chipping. Stick to mild, non-abrasive cleaning solutions that effectively remove dirt and soap scum without compromising the integrity of your color transformation.
Avoid Harsh Chemicals
Protect your painted bathtub like a cherished work of art by steering clear of harsh chemicals. Harsh cleaning agents can strip the paint and compromise the durability of your color change. When selecting cleaning products, check for labels that indicate they are safe for painted surfaces. Mild, chemical-free alternatives are your best allies in preserving the brilliance of your bathtub’s new color.
Conclusion
In conclusion, changing the color of your bathtub is not just a DIY project—it’s a creative escapade. Mark down your journey from a plain tub to a vibrant canvas that speaks to your style. With each brushstroke and every splash of color, you’re not just changing a bathtub; you’re creating a bathtub masterpiece. Dive into the world of bathtub transformation, where color is your brush and markdown is your guide. Elevate your bathing space with a touch of creativity that reflects your unique style and turns your bathtub into a canvas of elegance.
