Are you tired of dealing with a loose and wobbly kitchen faucet? A wobbly faucet not only compromises the aesthetics of your kitchen but can also lead to annoying leaks and unnecessary water wastage. Fortunately, you don’t need to be a professional plumber to tighten your kitchen faucet securely. With a few simple steps and basic tools, you can easily fix the problem yourself. In this comprehensive guide, we will walk you through the process of tightening your kitchen faucet, ensuring a stable and leak-free fixture.
Tighten Your Kitchen Faucet Like a Pro: A Step-by-Step Guide
Step 1: Gather Your Tools
Before you start the tightening process, it’s important to gather all the necessary tools. Here’s what you’ll need:
- Adjustable wrench
- Allen wrench (hex key)
- Screwdriver (if required)
- Plumber’s tape (Teflon tape)
Once you have these tools ready, you’re all set to begin tightening your kitchen faucet.
Step 2: Turn Off the Water Supply
Before working on your faucet, it’s crucial to turn off the water supply. Locate the shutoff valves under the sink and turn them clockwise until they are fully closed. This will prevent any water from flowing while you work, minimizing the risk of accidental leaks.
Step 3: Identify the Type of Faucet
Different types of faucets have varying mechanisms for tightening. The most common types are ball faucets, cartridge faucets, and ceramic disc faucets. Understanding the type of faucet you have will help you determine the specific steps required to tighten it. Consult your faucet’s user manual or manufacturer’s website for identification if you’re unsure.
Step 4: Access the Faucet Components
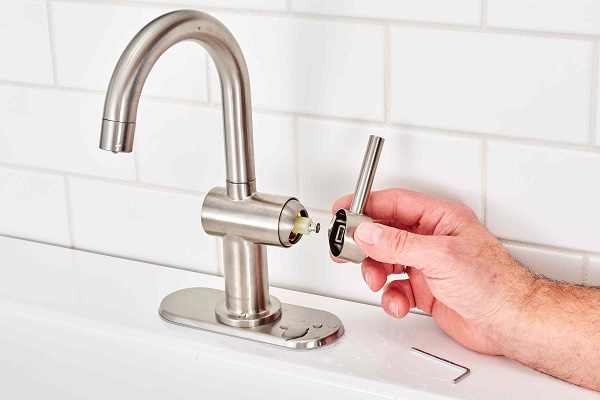
To access the internal components of your faucet, you’ll need to remove the decorative cap or handle. The method will vary depending on your faucet type. Here’s a general guideline for common faucet types:
For Single-Handle Faucets:

- Look for a small opening or set screw on the handle.
- Use an Allen wrench to loosen the set screw or remove any decorative cap covering the screw.
- Once the set screw is loose or removed, lift the handle off the faucet.
For Double-Handle Faucets:

- Locate the decorative caps on top of each handle.
- Pry off the caps gently using a flathead screwdriver or your fingernail.
- Unscrew the handle screws with a screwdriver.
Step 5: Tighten the Faucet Base
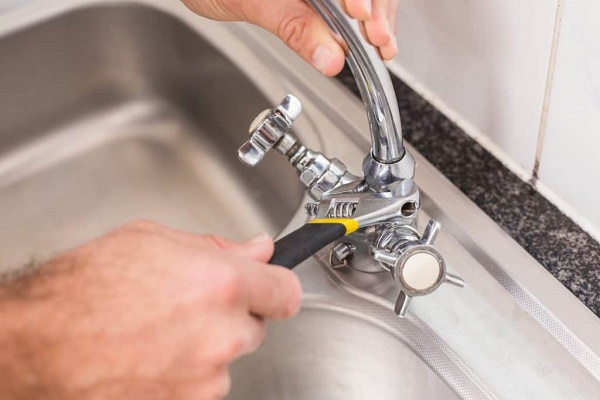
With the faucet handle(s) removed, you’ll now have access to the base of the faucet. Use an adjustable wrench to tighten the mounting nut located beneath the faucet. Turn the nut clockwise until it is snug and the faucet feels stable. Avoid overtightening, as this can cause damage to the faucet or the sink.
Step 6: Reassemble the Faucet
After tightening the faucet base, it’s time to reassemble the components. Follow these steps:
- Place the handle(s) back onto the faucet and secure them using the set screws or handle screws.
- If you removed any decorative caps or covers, reattach them to the handles.
- Ensure the handle(s) are aligned correctly and functioning smoothly.
Step 7: Turn On the Water Supply
Before testing the faucet, turn on the water supply by reopening the shutoff valves under the sink. Gradually turn the valves counterclockwise to allow the water to flow. Check for any leaks around the base of the faucet or under the sink. If you notice any leaks, retighten the faucet base or consider replacing worn-out parts.
Step 8: Apply Plumber’s Tape (Optional)
If you experience persistent leaks even after tightening the faucet, you can use the plumber’s tape as an additional measure to prevent water seepage. Here’s how:
- Remove the faucet handle(s) by following the steps mentioned earlier.
- Wrap a few layers of plumber’s tape clockwise around the threaded portion of the faucet stem.
- Reassemble the faucet, ensuring a secure fit.
Plumber’s tape acts as a sealant, reducing the chances of water leakage.
Step 9: Enjoy Your Sturdy Faucet
Good! You’ve successfully tightened your kitchen faucet like a pro. Say goodbye to wobbles and leaks. Take a moment to appreciate your handiwork and enjoy the convenience of a stable and functional kitchen fixture.
Remember, regular maintenance and periodic checks will help keep your faucet in optimal condition. If you encounter any persistent issues or if your faucet requires professional attention, don’t hesitate to seek assistance from a licensed plumber.
Now go ahead and impress your family and friends with your newfound faucet-tightening skills.
Additional Tips and Recommendations
Here are some additional tips and recommendations to ensure a successful and long-lasting faucet-tightening process:
- Inspect for damaged parts: While tightening your faucet, take a moment to inspect the various components for signs of wear or damage. If you notice any cracks, corrosion, or malfunctioning parts, it’s advisable to replace them to prevent future problems.
- Clean the faucet: Before reassembling the faucet, take the opportunity to clean any accumulated debris or mineral deposits. Use a mild cleaning solution or vinegar and a soft brush to scrub away any dirt or grime. This will not only improve the appearance of your faucet but also enhance its performance.
- Follow manufacturer’s instructions: Different faucet brands and models may have specific instructions or unique components. Refer to the manufacturer’s instructions or online resources for detailed guidance tailored to your specific faucet. This will ensure that you follow the correct procedures and avoid any potential mistakes.
- Consider professional help for complex issues: While tightening a loose faucet is a relatively simple task, there may be situations where the underlying problem requires professional intervention. If you encounter complex issues such as severe leaks, damaged plumbing connections, or unfamiliar faucet types, it’s recommended to seek the assistance of a qualified plumber to avoid any further complications.
- Regular maintenance: To prolong the lifespan of your kitchen faucet and minimize the chances of it becoming loose again, incorporate regular maintenance into your routine. Periodically check for leaks, ensure all connections are secure, and address any issues promptly. This proactive approach will help you catch and resolve problems before they worsen.
- Upgrade to a high-quality faucet: If you find yourself repeatedly tightening a low-quality or worn-out faucet, it may be worth considering an upgrade. Investing in a high-quality faucet not only enhances the overall aesthetics of your kitchen but also improves functionality and durability. Look for reputable brands known for their reliability and long-lasting performance.
Remember, with a little patience and the right tools, tightening your kitchen faucet is an achievable task. By following these steps, you can regain stability and confidence in your faucet, allowing you to enjoy a functional and aesthetically pleasing kitchen for years to come.
